
A big storm can create all sorts of surprises for homeowners. A commonly needed repair after a storm is to your home’s siding, whether the siding is wood, composite, or vinyl. A falling tree branch, a projectile blown by the strong wind smashing into the siding, or the wind getting underneath a siding seam and peeling the siding from the wall are all ways that a storm can damage the siding.
Depending on the extent of your storm damage, you may be wondering if you can handle the siding repair yourself or if you should call a professional. At Built Strong Exteriors, we have over 25 years of experience helping homeowners with roofing and siding damage. We’re your partner in keeping your home in good repair.
Here are some tips for tackling a DIY vinyl siding repair project from our pros.
Assess the Damage
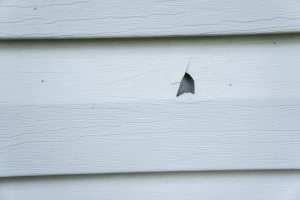
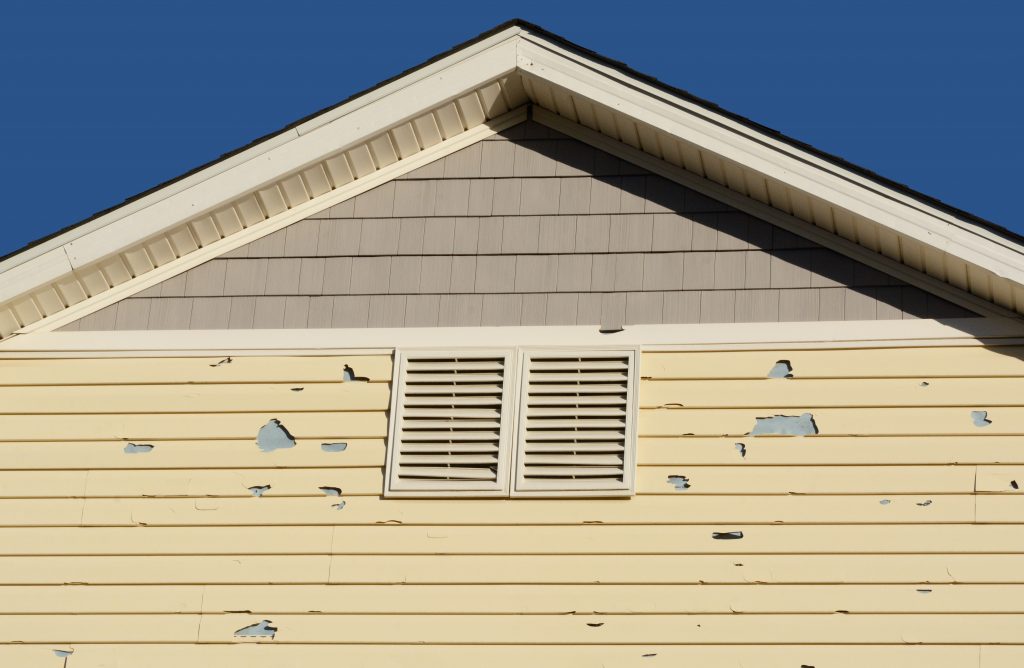
Scan the house’s exterior thoroughly. You may notice one problem, such as a crack or hole in a piece or two of siding, or a patch where the siding is gone. Where there is one problem, there may be others. You want to find all the places that need repair so you can take care of them in one go.
Depending on the type of siding you have, here are some signs of damage:
-
- Broken or cracked siding
-
- Bubbles, blisters, or peeling paint
-
- Missing siding
-
- Siding that is hanging loosely
- Divots, dents, and dips
Should You DIY Your Siding Repair?
When deciding whether DIY siding repair is for you, consider the following:
-
- How much time do you have? You’ll need to assemble the tools and take a trip to the siding store to get a matching piece. Then you’ll need a few hours, in the right weather, to tackle the repair.
-
- How good are you with your hands? If you’re handy and have successfully completed other DIY projects, you will likely be able to handle this one. As long as the damage isn’t too severe, and you have access to all the tools, it should be a project you can handle.
-
- Do you already have the necessary tools or will you have to purchase them? If you don’t have the right height ladder, an electric saw, and other tools, it may be more cost-effective to have a professional take care of it.
-
- Do you have confidence in your repairs, or do you need a warranty? What will happen if you make a mistake and need to start over? What if you don’t get the siding installed properly and moisture gets into your home, creating leaks and a mold problem?
- What if the repair fails? Do you have the patience to redo it, or would it be better for your peace of mind to let a pro handle it?
If you’ve decided DIY siding repair is for you, here are our recommended steps.
Assemble Your Tools
If you’re doing siding repair, you’ll need the following:
-
- A Zip Tool (for vinyl siding repair)
-
- Wood blocks
-
- Replacement siding
-
- 1 1/4-inch roofing nails
-
- Caulk (as needed)
-
- Tin Snips (for vinyl siding)
-
- Circular saw (for wood or composite siding)
-
- Paint for paint matching if the new siding is unpainted or is a different color due to weathering.
- Ladder
Matching the Siding
It can be difficult to find matching replacement vinyl siding because manufacturers discontinue older styles and colors and introduce new ones. Also, siding does not often have any marks that help you figure out where it came from, so if you purchased a home with siding already installed, you might be shooting in the dark to determine brand, style, and manufacturer.
Hopefully, you have some spare siding from the original installation. If you can’t locate an exact match, take your damaged piece to a siding distributor. They can help you find the closest match.
If you can’t find the right color at a distributor, try taking the broken piece to a paint store for a color match. Paint the replacement piece with a coat of acrylic primer and a coat of acrylic house paint in the correct color.
If you are replacing composite or wood siding, paint matching is in your future. Sometimes paint companies can match the color from a good digital picture of the current siding; other times they might ask for a paint chip, which you can scrape off with your scraper.
Unlock the Siding Lickety-Zip
Your zip tool will allow you to unlock the siding from the surrounding pieces. Starting at the bottom of the piece you are replacing, use the zip tool to apply pressure up and beneath the siding. Stop when you can feel the tool connect with the bottom lip of the piece you are working with.
Pull the zip tool down and toward you to unhinge the bottom lip and then slide it along the bottom to “unzip” it. As you pull out the siding, insert a wooden shim between the pieces to keep it separated from the wall. Repeat this procedure for sections above the siding that was damaged.
Carefully lift the bottom edge of the siding panel above the one you are removing to expose the nails. Using your flat pry bar and hammer, remove all the nails in the hem of the damaged panel, then pull out the damaged siding.
In Goes The New Vinyl Siding Piece
Slide the new piece of vinyl siding upwards until the lower lip attaches into the piece beneath. Drive 1 ¼ inch nails meant for roofing through the hem or flange along the top of the new piece, spacing the nails every 16 inches or so. Take care not to nail the heads too tightly to the walls, or the vinyl siding will warp when the temperature increases. Vinyl siding needs to move freely so it can withstand temperature changes.
Once you’ve nailed the new piece in place, use your zip tool to connect the above piece over the siding.
Contact a Professional Siding Specialist
If this sounds too involved, or you got partway through the DIY process, and you find yourself in over your head (don’t worry, it happens more often than might think), then give the pros at Built Strong Exteriors a call. We will be happy to handle your vinyl siding repair job and get you on your way.


